Three Nights at the Blacksite Pressure Guide [April Fools]
When it comes to April Fools’ game updates, players typically expect playful jokes and light-hearted pranks. However, the developers of *Pressure* took a different route this year—introducing a chilling new game mode titled *Three Nights at the Blacksite*, clearly inspired by the eerie atmosphere of *Five Nights at Freddy’s*. This isn’t your average joke update; it’s a full-on survival horror experience. If you’re ready to face the darkness, here's how to survive all three terrifying nights.
Recommended Videos
Table of Contents
- How to Survive in Three Nights at the Blacksite
- First Night Walkthrough
- Second Night Walkthrough
- Third Night Walkthrough
How to Survive in Three Nights at the Blacksite
Screenshot by The Escapist.
If you've played *Five Nights at Freddy’s*, the core mechanics will feel familiar. For those already acquainted with *Pressure*, you’ll have an edge knowing which monsters lurk in the shadows and how to deal with them. Regardless, the following guide walks you through each night step-by-step to ensure your survival.
First Night Walkthrough
Screenshot by The Escapist.
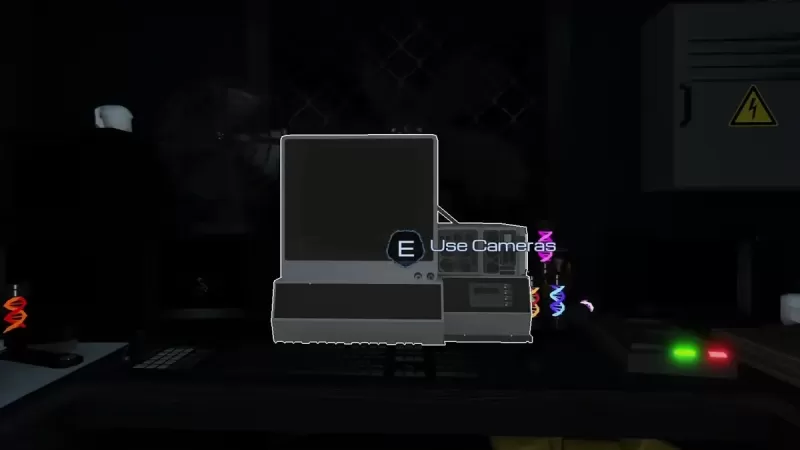
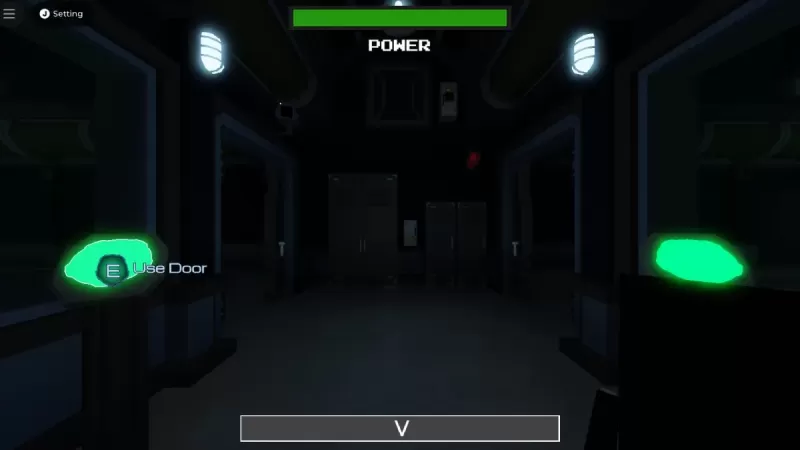
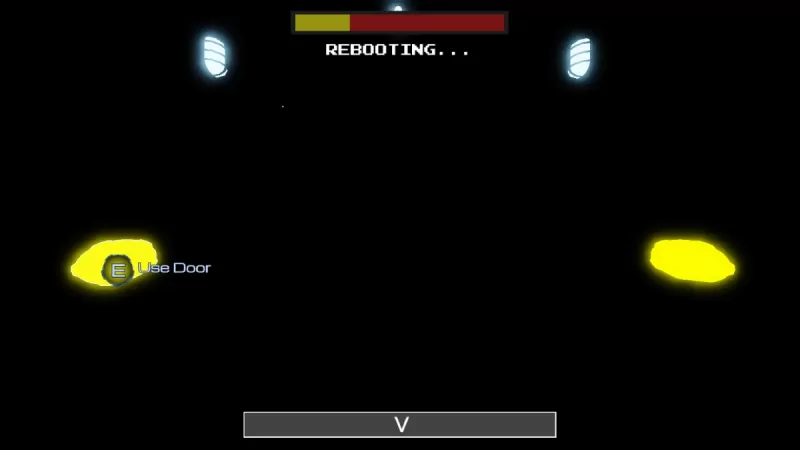
You begin inside a **camera control room**, surrounded by surveillance feeds. Behind you are **two doors** that can be opened or closed. Keep in mind that closing the doors drains your limited power supply. Once power runs out, it's game over. Your only defense mechanisms are using the flashlight or closing the doors—both require power to function.
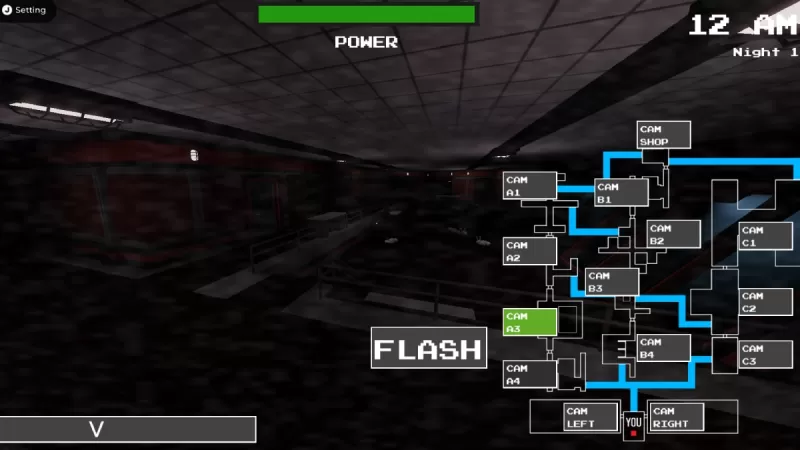
Your main objective is to constantly monitor the cameras, especially the top one where **Sebastian** should always appear. If he vanishes from that feed, he'll reach you quickly and end your shift. Regularly check for anomalies on camera and turn around occasionally to listen for threats. Sound cues are clearer when not in camera mode, so staying alert is crucial.
Screenshot by The Escapist.
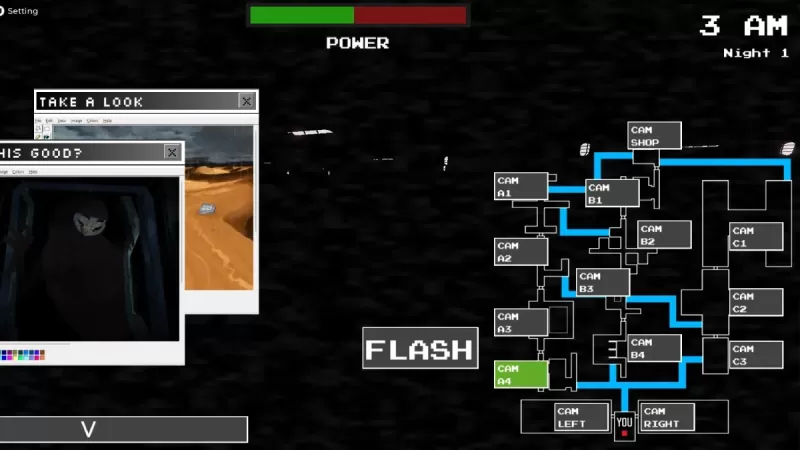
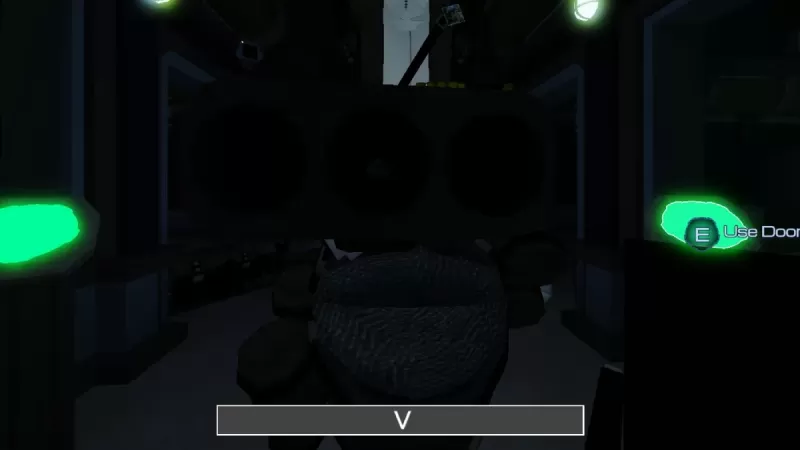
The first **Angler attack** usually occurs around **2 AM**. You’ll notice the lights flickering—this is your cue to turn around and close both doors. At the same time, you may start receiving pop-ups from the **Painter**, which you can safely ignore as they're meant to distract you.
We recommend turning around every 10 seconds or whenever you hear strange noises. Continue cycling through the camera feeds and flash if Sebastian appears. If he disappears from the top camera, immediately check **Cameras 1 and 2** to prevent him from advancing too far. Stick to these strategies and you’ll make it to 6 AM without incident.
Second Night Walkthrough
Screenshot by The Escapist.
At 1 AM on **Night 2**, there are no immediate threats. Keep checking the cameras and flash when something seems off. Around 2 AM—similar to Night 1—you’ll encounter the **Angler** again. The lighting in the camera feeds becomes dimmer, making visual monitoring more difficult. To compensate, cycle frequently through all available cameras, particularly **Cameras 1 and 2**.
A new threat emerges tonight—**Crooked**. He appears near your doors, and your best defense is to close them just as he arrives. Additionally, static interference increases across the cameras, and Painter pop-ups become more frequent. Stay sharp and close them quickly to maintain focus.
As you approach the final hour (around 5 AM), brace yourself for two simultaneous Angler attacks—one on each side. This is the most intense part of the night, so avoid distractions and remain vigilant throughout.
Third Night Walkthrough
Screenshot by The Escapist.
Night 3 ramps up the difficulty significantly. From the moment your shift starts, **Sebastian** escapes the top camera within seconds, followed shortly by an **Angler attack**. Forget any relaxed pacing from previous nights—this is a non-stop battle for survival.
After the initial Angler attack, keep the door closed for a few moments before reopening. Monsters move faster and hit harder than ever, making quick reactions essential. By around 3 AM, you’ll face two consecutive door attacks. Managing your power becomes even more critical now.
The hours between **4 AM and 5 AM** are the most challenging. You must balance defending against Sebastian with conserving enough power to survive. A useful tip: prioritize saving power over flashing Sebastian if he’s located at **Camera A1, B1, or C1**, as he won’t advance during those moments.
Screenshot by The Escapist.
If you fail during Night 3 (or Night 2), you can restart from the beginning of the current night. Successfully surviving all three nights means you’ve completed the event and earned the **Connection Terminated badge**—a well-deserved reward for enduring the terror.
If you found this *Three Nights at the Blacksite* walkthrough helpful, consider checking our All Monsters guide next to improve your odds in future encounters in *Pressure*.


-
1

Announcing the Bazaar Release: Date and Time Unveiled
Feb 02,2025
-
2
Vampire Survivors – Arcana Card System Guide and Tips
Feb 26,2025
-
3

Novel Rogue Decks Android Debut
Feb 25,2025
-
4

Marvel Rivals Update: News and Features
Feb 19,2025
-
5

GTA 6 Release: Fall 2025 Confirmed
Feb 23,2025
-
6
Get Exclusive Roblox DOORS Codes for January 2025
Feb 10,2025
-
7

Marvel Rivals Unveils Season 1 Release Date
Feb 02,2025
-
8

Anime Fate Echoes: Get the Latest Roblox Codes for January 2025
Jan 20,2025
-
9
Roblox: Exclusive Prison Codes Revealed (Updated January 2025)
Feb 19,2025
-
10

DC Heroes Unite: New Series from Silent Hill: Ascension Creators
Dec 18,2024
-
Download

Street Rooster Fight Kung Fu
Action / 65.4 MB
Update: Feb 14,2025
-
Download

Ben 10 A day with Gwen
Casual / 47.41M
Update: Dec 24,2024
-
Download

A Simple Life with My Unobtrusive Sister
Casual / 392.30M
Update: Dec 10,2024
-
4
Day by Day
-
5
Translate - Voice Translator
-
6
Mega Jackpot
-
7
Midi Commander
-
8
Idle Rush : Zombie Tsunami
-
9
The Lewd Knight
-
10
VPN Qatar - Get Qatar IP